How to Run Remote Workflows using the Workflow Executor
1. What You Will Learn
In this tutorial you will learn how to download and execute Workflows using the PAK Workflow Executor.
3. Defining the Repository
In order to let the Workflow Executor look for uploaded Workflows, you need to add a new Workflow repository.
To make your repository eligible for Workflow resolving, select either Workflows or Commands and Workflows as the repository type.
You can learn more about how to create your own repository on nexus here.
4. Looking for Remote Workflows
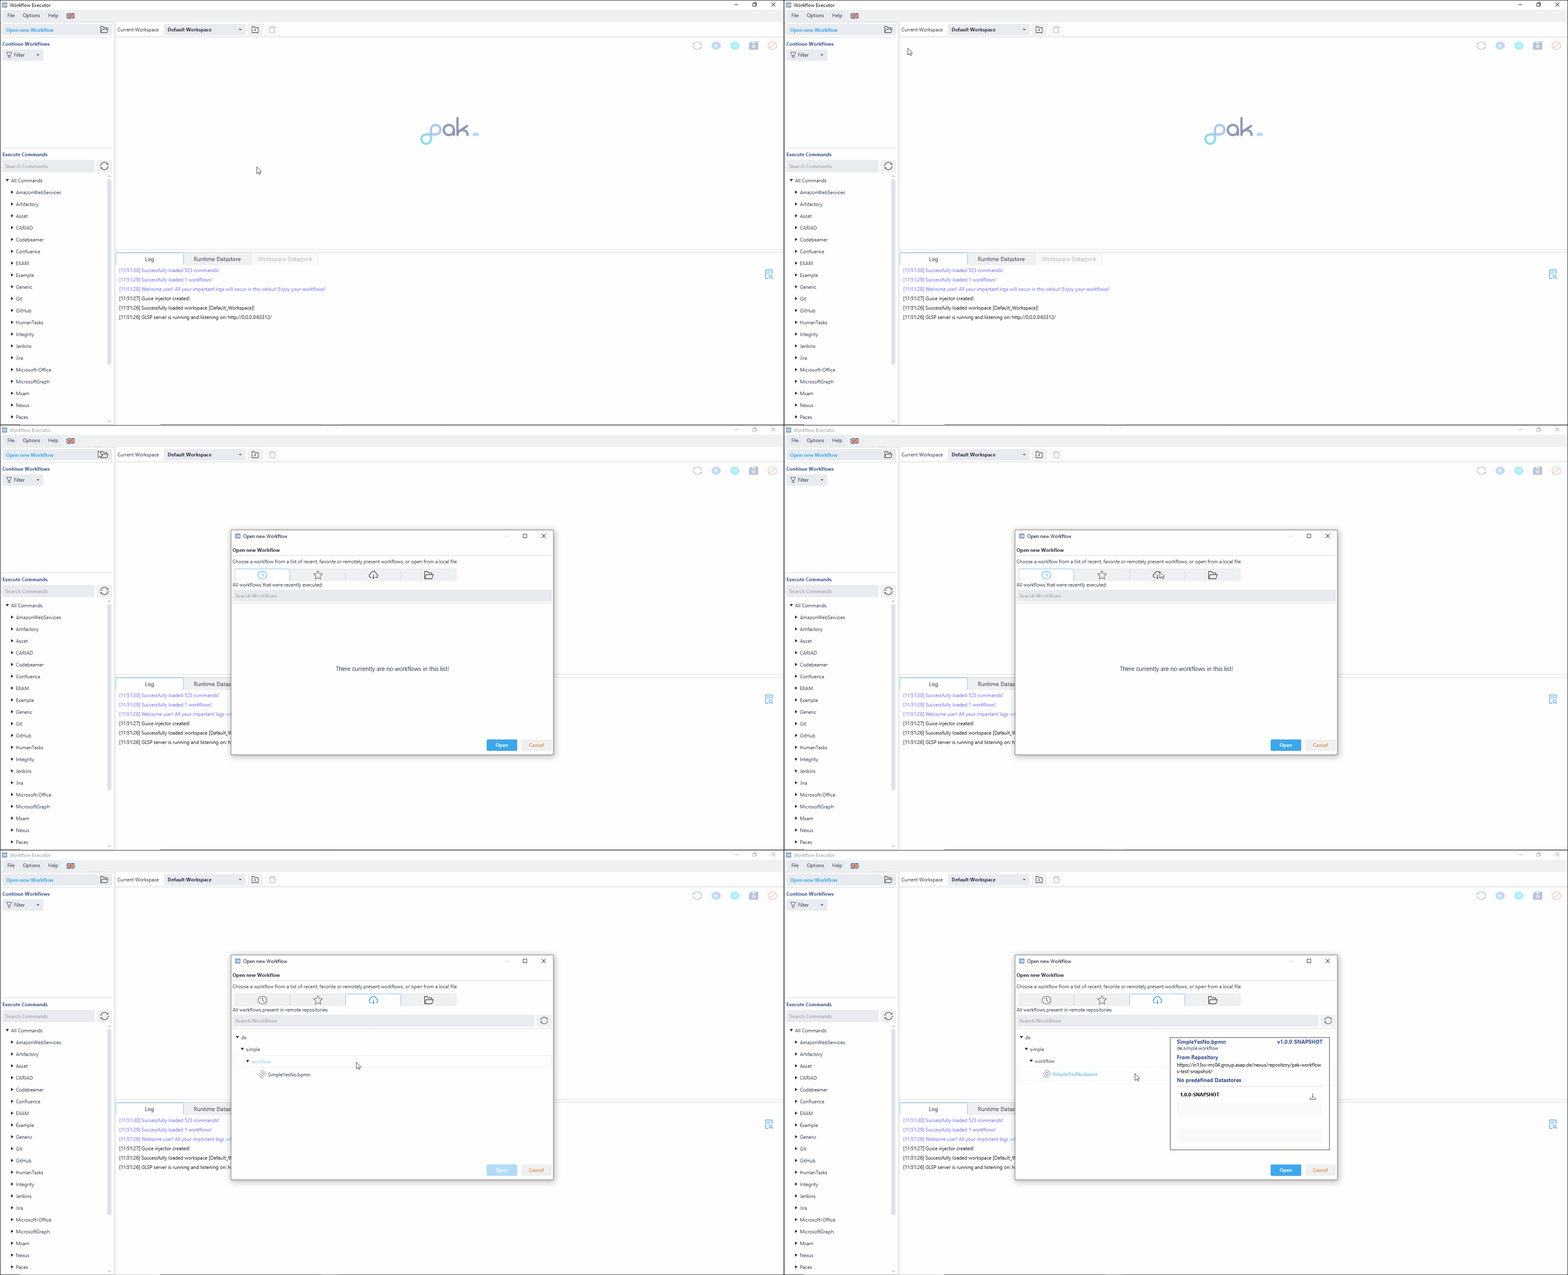
As soon as your repository changes are saved, the Workflow Executor begins looking for all valid Workflows in the Workflow repositories. In order to view all Workflows in your enabled repositories, click on ‚Open new Workflow‘ and select the third tab like shown below.

5. Executing a Remote Workflow
To execute a Workflow, select it from the Workflow tree in the resulting view.
| 1 | General information like the selected version, name and repository source of the Workflow is displayed here |
| 2 | When predefined datastores are available for your Workflow, their names will be listed here |
| 3 | All available versions for your Workflow will be displayed, and can be opened, from here |
Remote Workflows can either be opened by double-clicking them in the tree (this will always open the newest version) or by double-clicking/clicking the download button in the version overview. This leads to the Workflow Executor downloading your Workflow into the .modelcache directory in the installation folder of your application and opening it once finished.
After the Workflow is downloaded, you can simply resume by running it as described in this guide.