Inspect and Edit Datastore Values
What You Will Learn
This guide will explain how to do manage datastore values inside the Workflow Executor app.
| For the following chapters the Workflow Executor App has to be in the ‚expert mode‘. How to toggle this mode can be found here. |
1. What are ‚Datastore Values‘?
In order to make a Workflow run, certain values have to be provided for it (e.g. a path to a file). While the Workflow is being executed, it may create some values itself. All of these values will be shown in the datastore, as seen below:
2. Datastores inside the Workflow Executor App
During the execution of a Workflow, its Datastore Values will be loaded into the ‚Runtime Datastore‘, where they will be kept and displayed while the Workflow is being executed. If a workflow aborts and has sub-workflows you can select each individual sub-workflow from a dropdown. The data shown then depends on what data the selected workflow used to read or write its values. As each Workflow has its own separate ‚Runtime Datastore‘, the Datastore Values inside the ‚Runtime Datastore‘ will change!
The Workspace Datastore is currently only active when a ‚Single Command‘ is about to be run, more about running Single Commands can be found here.
In general the Workspace Datastore holds and displays all the accumulated Datastore Values from already run Workflows or Single Commands.
3. Inspect Values
To inspect the datastore values, simply:
| 1 | double click the desired value row |
| 2 | A new window with the value will be displayed |
4. Edit Values
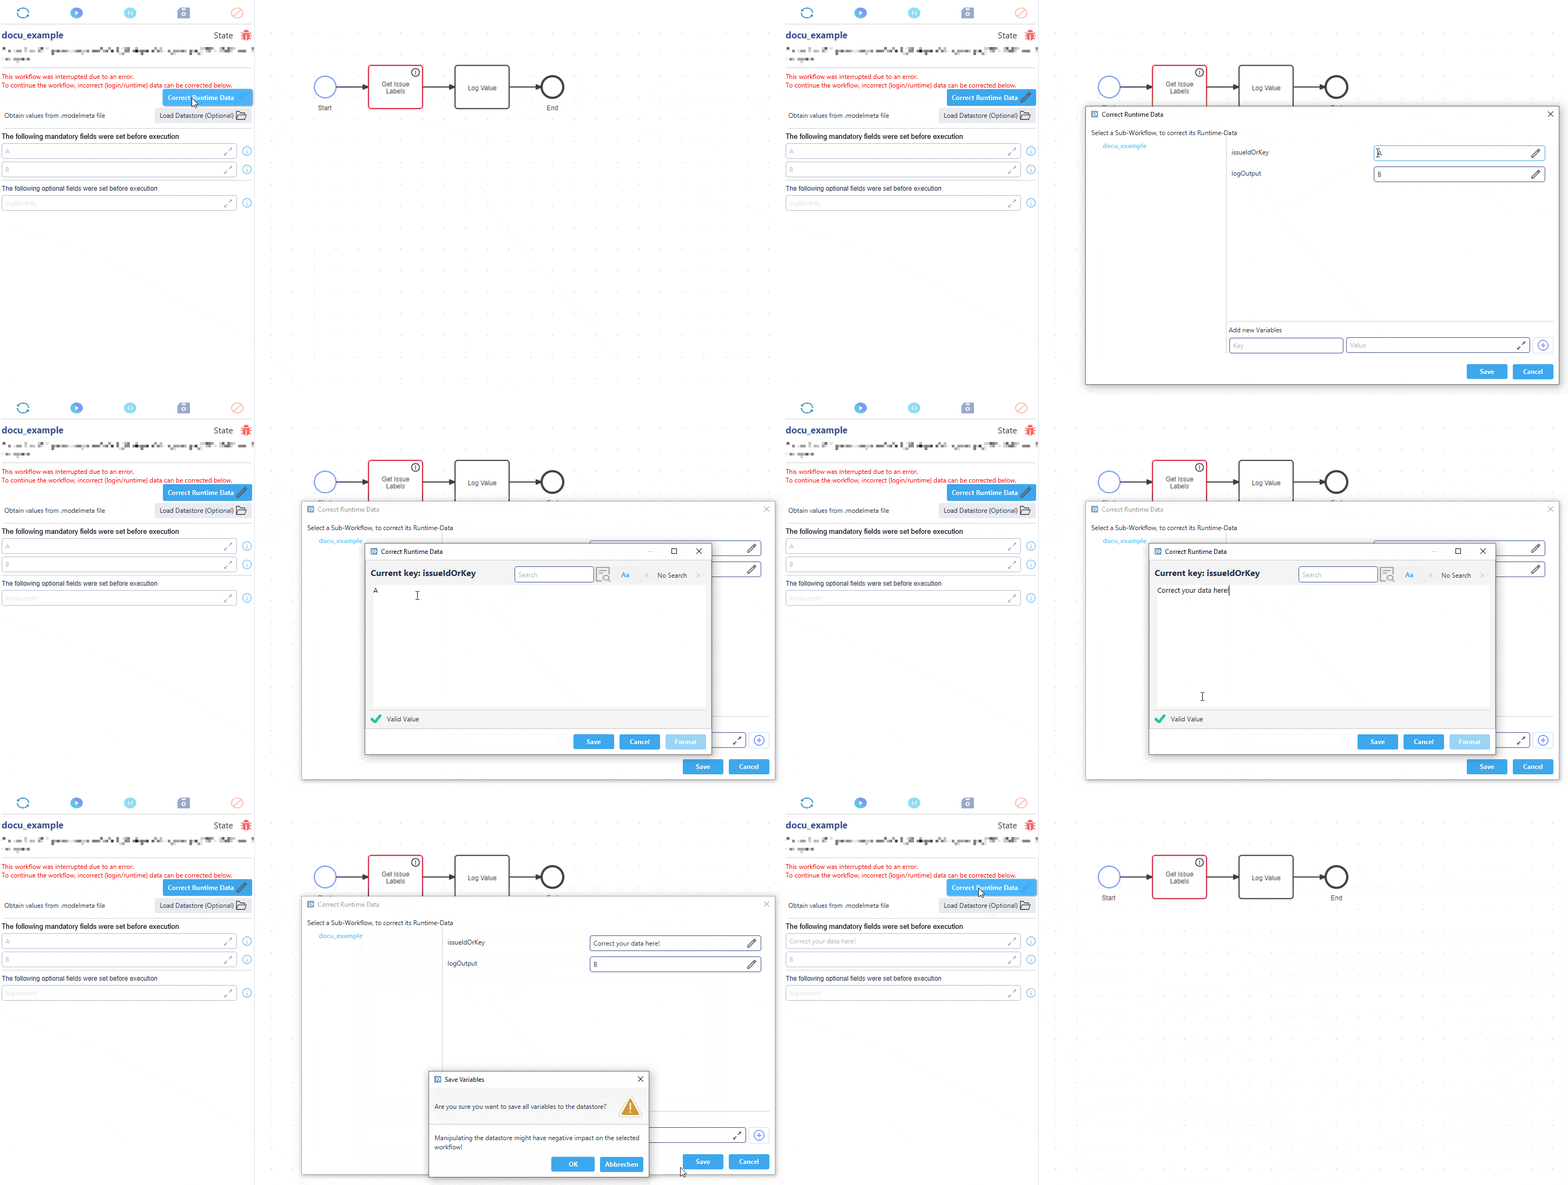
In some cases values lead to unexpected errors that need to be corrected.
4.1. Correct Values of a simple Workflow
A simple workflow is a workflow without any sub-workflows.
|
Figure 4. Dialog to correct runtime data.
|
Figure 5. Editor to edit keys with more complex data.
|
| 1 | When an error occurs, a Correct Runtime Data button appears. Once clicked, a dialog opens to edit the current runtime data. |
| 2 | Here you should see the name of the current workflow and nothing else. |
| 3 | Here you should be able to see all editable keys. |
| 4 | For every key you should see text field where you can edit the value of the key. |
| 5 | Every text field contains an edit icon. Clicking this will open an editor for more complex values that are difficult to handle in a regular text field. |
| 6 | You can also add new keys with the Add new Variables section. |
| 7 | To save your changes you can click on the save button prompting you to confirm your actions. |

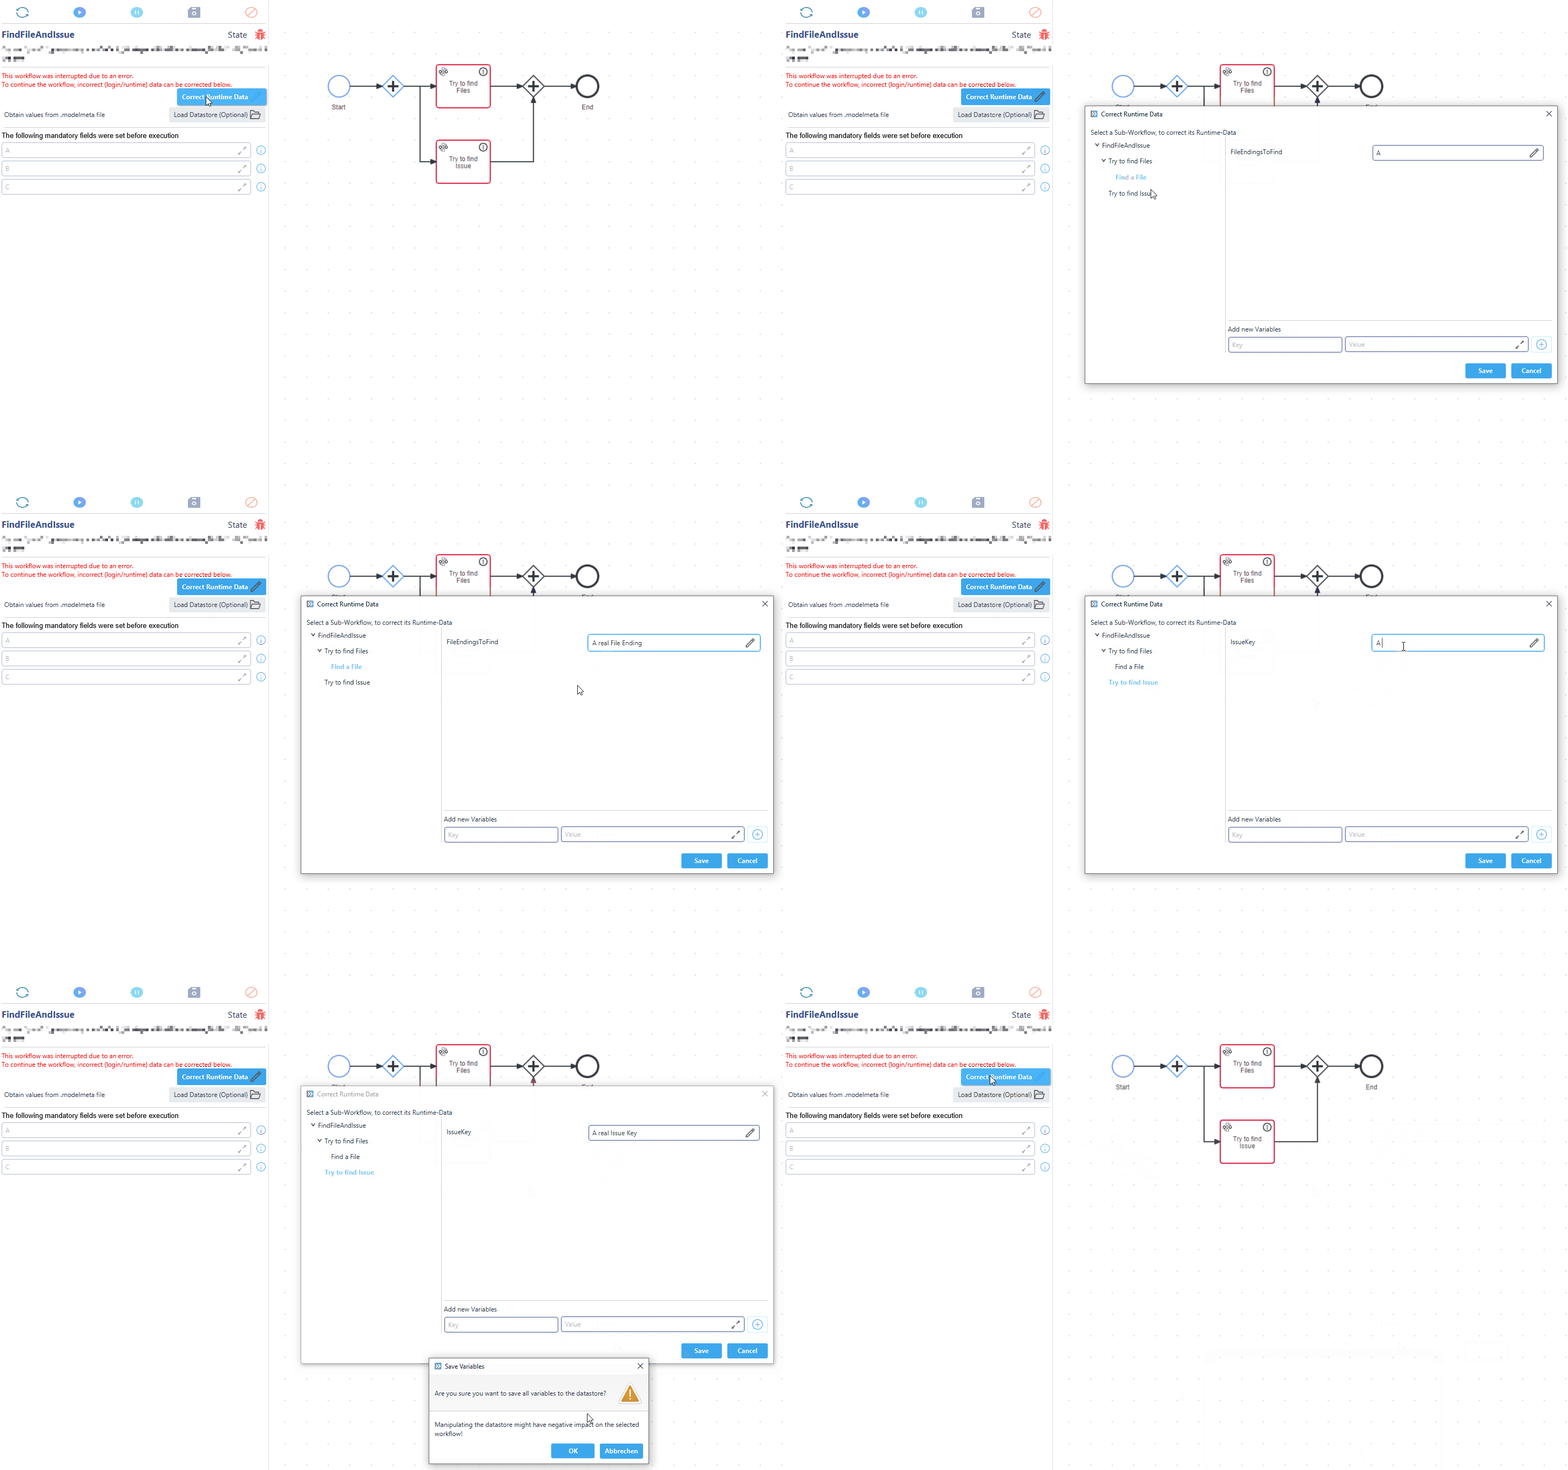
4.2. Correct Values of a nested Workflow
A nested workflow uses other so called sub-workflows to do a part of their task. In some cases these can fail because of erroneous data.
You can correct of the main workflow in the same way you can with a simple workflow.
| 1 | A Tree view of the nested workflows. To see any nested workflows of a sub-workflow, you can click on the triangular shape on the left side of the workflow name to expose the nested workflows. |
| 2 | All keys visible to the currently selected workflow with their respective value. |
| The tree view only contains workflows that are a parent of or are an error causing workflow. |
An example of workflows not being shown:
| 1 | This model does not fail. |
| 2 | This model also does not fail. |
| 3 | This model fails. |
| 4 | Tree view only shows failing workflow and its parent. |
When a sub-workflow is the cause of the failure, you’ll need to select the exact workflow the error occurred in.
| 1 | Select the exact workflow that failed. |
| 2 | Edit the key that needs adjustments. |
| Changing a value only changes it in the currently selected workflow! |
This is how editing data of a nested workflow can look like:
