How to Up-/Download Workflows using the PAK Editor
1. What You Will Learn
In this guide you will learn how to upload and download Workflows using the PAK Editor.
2. Prerequisites
To complete this guide you will need
-
Roughly 15 minutes
-
The PAK Editor ( Download )
3. Defining the Repository
In order to upload/download Workflows with the Editor, you need to add a new Workflow repository.
The repository content defines what kind of content can be fetched from those repositories. This can either be Commands, Workflows or both.
To make your repository eligible for Workflow resolving, select either Workflows or Commands & Workflows as the repository content, telling the application that those contain Workflows.
4. Looking for Remote Workflows
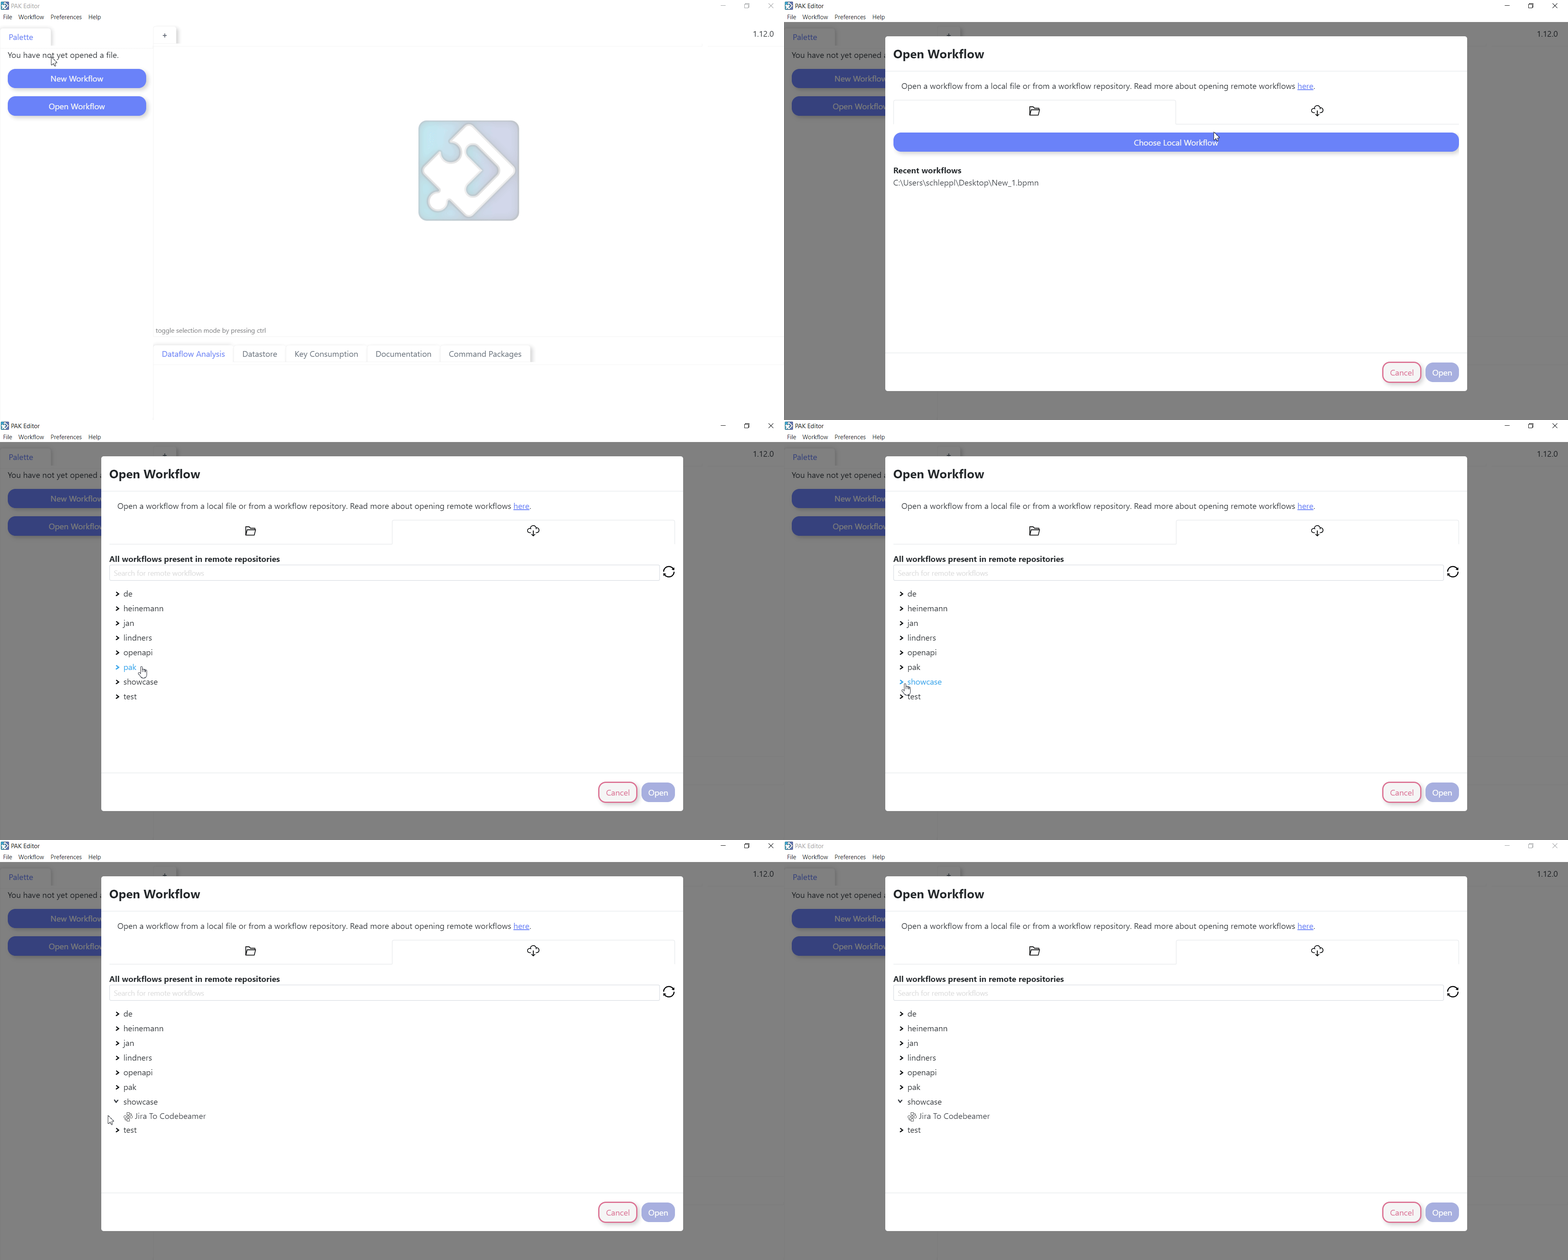
As soon as your repository changes are saved, the Editor begins looking for all valid Workflows in the Workflow repositories. In order to view all Workflows in your enabled repositories, click on ‚Open Workflow‘ and select the second tab like shown below.

5. Upload Workflow to Remote Repository
To upload a Workflow you first need to create one. Here, we use the Workflow as it was described by the How to Build your First Workflow guide.
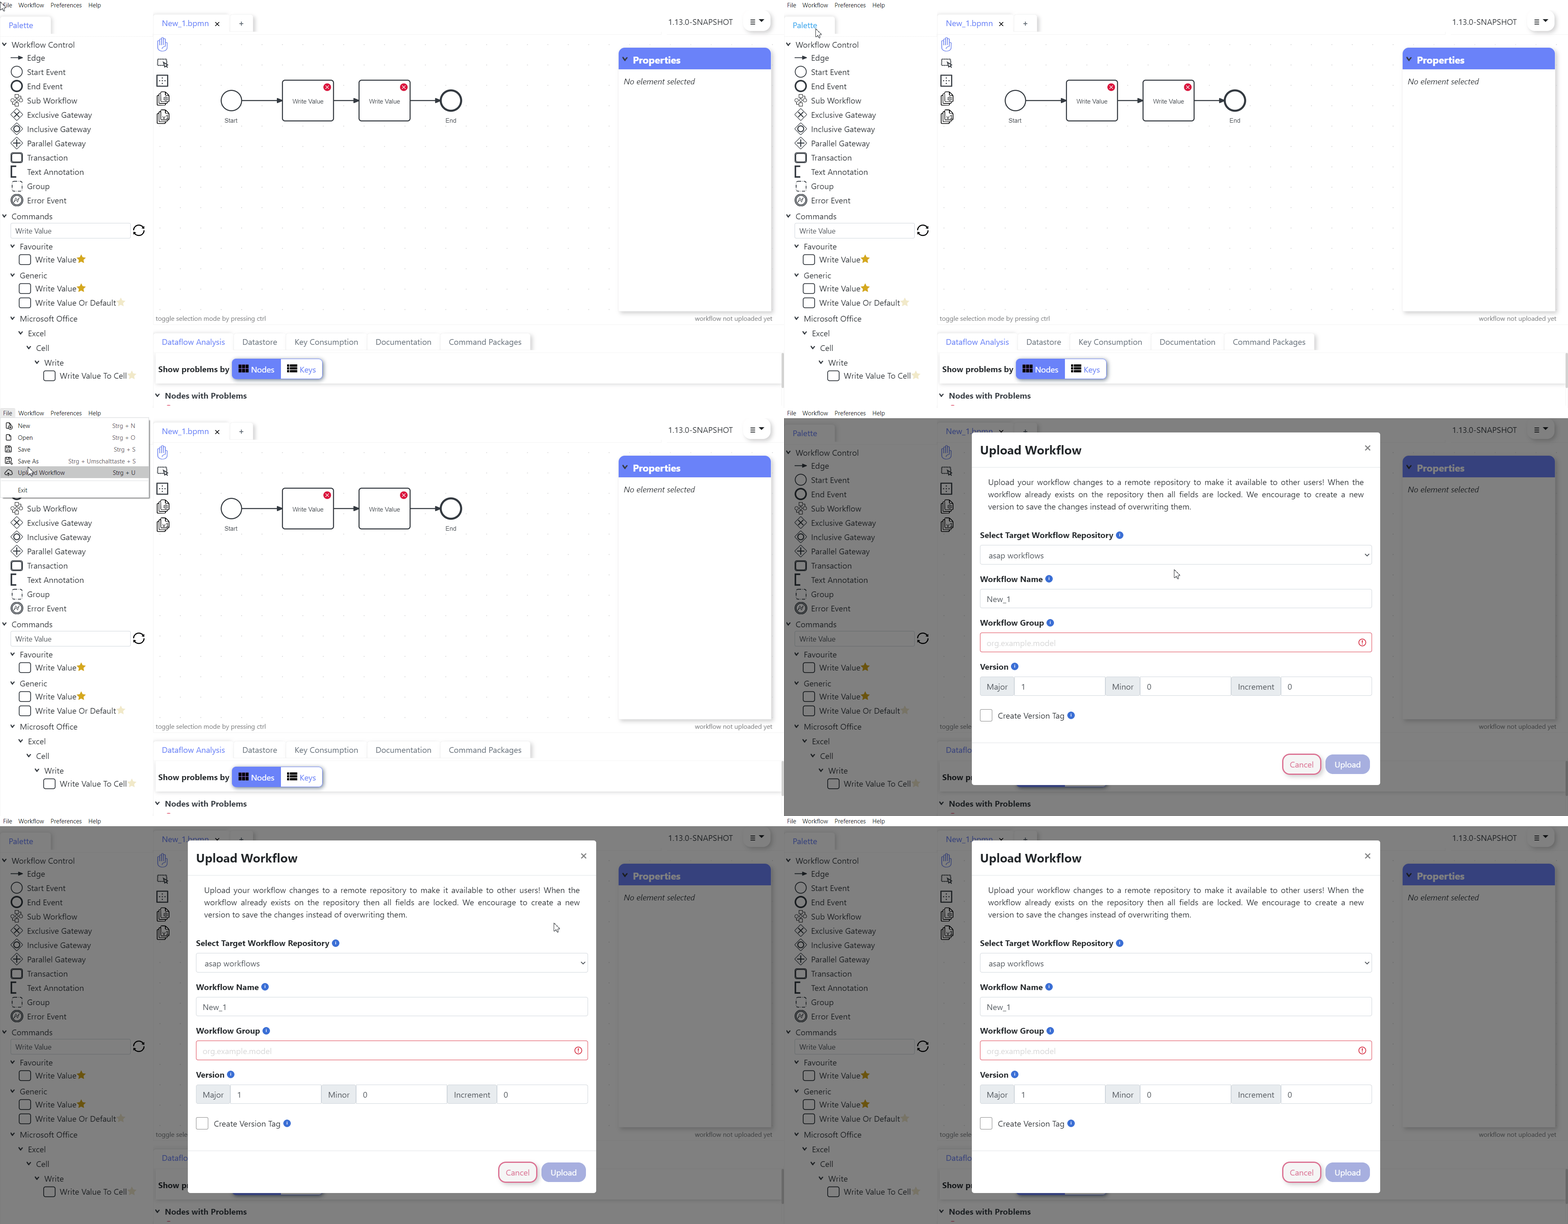
After saving the Workflow locally, you are able to upload it to a remote repository. To do this, navigate under File > Upload Workflow .

| A Workflow must be saved locally before being eligible for uploading. |
5.1. The First Upload
Whenever a Workflow is uploaded for the first time to a remote repository you will be prompted by the dialog below. Fill it out and press the Upload Button to upload your Workflow.
| 1 | You can decide to which repository you want to upload the Workflow to. By default the first one found in the repository list is chosen. |
| 2 | You can rename the Workflow before you upload it. Renaming also leads to renaming of the local Workflow file! |
| 3 | Each uploaded Workflow must be part of a group. The groups are used to sort and filter the Workflows in the current available Workflow view. |
| 4 | To be able to track changes every Workflow will get a version assigned. Every new Workflow starts at 1.0.0 by default. |
| 5 | A Version Tag will hinder any future uploads to overwrite the version which was tagged. E.g. when 1.0.0 was has a Version Tag then it cannot be overwritten by an upload anymore. |
| 6 | After everything is filled out you can press Upload. |
5.2. Updating the Workflow
Whenever you have successfully uploaded a Workflow or when you try to upload one which already exists on the remote repository, the below dialog will open instead.
The dialogs values are preset with the values from the Workflow and cannot be changed anymore. When you did changes locally you can now either overwrite the current remote version or upload a new version.
| 1 | When you uploaded a Workflow successfully a moment before this green box will show you its success. It is orange when something has gone wrong during uploading. |
| 2 | You can still change the repository. Maybe this Workflow already exists on this one but you want to upload it to another? The repository will be automatically chosen to that one which was used to upload the Workflow before. |
| 3 | Name, Group and Version are not editable anymore. |
| 4 | To increase the version when uploading press the Create new Version button, then the Creating new Version dialog will be opening. |
| 5 | To just overwrite the current uploaded version of the Workflow, just press Overwrite and upload it again. |
| When the remote version you want to update is flagged with the Version Tag, then you cannot overwrite it anymore and you must increase the version instead. |
Creating new Version
When a new version shall be created a new dialog opens which allows the editing of the version again. The increment of the version is automatically raised by one. Pressing the Upload new Version button will upload the current Workflow with the new version.
6. Download Workflow from Remote Repository
After you have uploaded your Workflows you can share them through the repository and download them to your local system. Either to look what they entail, or to apply changes.
To see where to find the available Workflows read through this part of the guide again.
The Workflows are shown in a tree like structure. Each node of the tree is a part of the group defined when uploading the command.
When selecting a Workflow you have some options how you want to download it.
| 1 | You can search for a Workflow. Either by its name or by its group. |
| 2 | The elements with the Workflow symbol |
| 3 | Refresh the list of Workflows if you want to see newest Workflow versions on the repository. Always do this before opening a Workflow as someone might have uploaded a new version. |
| 4 | When selecting a Workflow a new small window opens, telling you properties and available versions of the Workflow. |
| 5 | Pressing the download button or double clicking an explicit version, downloads the chosen Workflow to your local machine. You will be asked whereto save the new Workflow. |
| 6 | When choosing a version without downloading it, then you can open a preview of that Workflow by pressing the Open button. |
7. What to do next?
Now you are able to upload and download Workflows, sharing them and updating them in the future. You may be interested to run the uploaded Workflows from a remote repository. This guide will show you how to do this in the PAK Workflow Executor.